Product Introduction
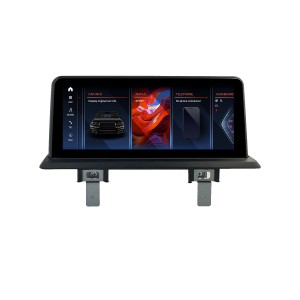
ugode’s Android display replacement is a high-tech in-car multimedia solution designed for the BMW 1 Series (E81, E82, E87, E88). The product is designed to replace the original display, providing richer functions and better user experience. Supporting Android Auto and Apple CarPlay, users can easily connect their smartphones to access a variety of applications and media content. With this upgrade, car owners can not only enjoy high-resolution display effects, but also get the convenience of intelligent navigation and multimedia playback, greatly enhancing driving pleasure.
How to install ugode Android display replacement
Here are the detailed steps to install the ugode Android display to help you complete this upgrade smoothly.
Preparation before installation
Tools and Materials Required:
- ugode Android display: Make sure the display you purchase is compatible with your BMW 1 Series model.
- Screwdriver: Prepare Phillips and slotted screwdrivers for removing and installing screws.
- Plastic Spudger: Used to carefully remove the dashboard panel to avoid scratching or damaging it.
- Cable Connectors: Make sure you have the appropriate connectors to connect your new display, if needed.
- Installation Manual: The installation manual that comes with the product provides detailed steps and precautions.
Make sure the vehicle power is turned off:
Before you begin installation, make sure your vehicle’s power is off to avoid any electrical malfunction or short circuit. This can be done by removing the key or turning off the vehicle’s power switch.
Installation Steps
Disassemble the original display:
- Carefully remove the dashboard panel: Use a plastic pry bar to gently pry up the panel starting from the edge of the dashboard, being careful not to use too much force to avoid damaging the clips. You can start from one side and gradually move to the other side to ensure that the panel is evenly stressed.
- Remove the screws that secure the display: Locate the screws that secure the original display, usually located at the four corners of the display, and remove them using a screwdriver. Keep the removed screws in a safe place for later use.
- Unplug the connection cable: Pull out the connection cable carefully, making sure not to damage any connectors. You can gently shake the connector to help it loosen, but avoid excessive force that may cause damage.
Connect ugode Android display:
- Insert the connection cable: Plug the connection cable of the ugode Android display into the vehicle’s power and audio system interfaces, making sure the connection is secure. Make sure the cable is inserted in place to avoid poor contact.
- Check the connection: After inserting the connection cable, check that all connections are secure to avoid loosening during use. You can gently pull the cable to ensure that it will not fall off easily.
Fix the new display:
- Place the ugode Android display: Place the new display into the dashboard, making sure it is positioned correctly and firmly fixed. Make sure the display is aligned with the edge of the dashboard to avoid any gaps.
- Secure with screws: Use the screws you removed earlier to secure the display to the dashboard, making sure it is secure and does not wobble. Tighten the screws one by one to ensure even force.
Test function:
- Start the car: Start the vehicle and check if the ugode Android display is functioning properly. Observe whether the display can start normally and display the interface.
- Test multimedia playback: Try to play music and videos to ensure the sound quality and picture are normal. You can connect a mobile phone to test to ensure that the audio output is normal.
- Check GPS navigation: Test the navigation function to ensure that the map is loaded and the positioning is accurate. You can enter a destination to see if the navigation is going smoothly.
- Test Bluetooth connection: Connect a mobile phone to test Bluetooth hands-free calling and music playback functions to ensure a stable connection.
Reinstall the dashboard panel:
- Make sure everything works: After confirming everything works, reinstall the dashboard panel and make sure it is secure. Make sure there is no gap at the seam between the panel and the dashboard.
- Check screws and connectors: Make sure all screws and connectors are properly installed to avoid loosening during driving. You can press the panel lightly to ensure it is firmly fixed.
Post-installation settings
Connect to smartphone:
- Open ugode Android display: Turn on the display and follow the on-screen prompts to connect your smartphone. Make sure your phone’s Bluetooth and Wi-Fi are turned on.
- Set up Android Auto or Apple CarPlay: If you are using Android Auto or Apple CarPlay, make sure your phone has the relevant app installed and follow the prompts to connect. You can connect via USB cable or wirelessly.
Personalization:
- Customized interface: Customize the interface settings according to your personal preferences and choose different themes and layouts. You can adjust the icon size and arrangement to improve the user experience.
- Set up Navigation and Music: Configure navigation, music, and other applications for easy access while driving. Frequently used navigation destinations and playlists can be preset for added convenience.
With the above steps, you can successfully install ugode’s Android display replacement and enjoy a smarter and safer driving experience. If you encounter any problems during the installation process, please refer to ugode’s customer support or online resources for help.
With this upgrade, you will experience smarter and safer driving pleasure and enjoy the fun of every trip.
Post time: Dec-05-2024


