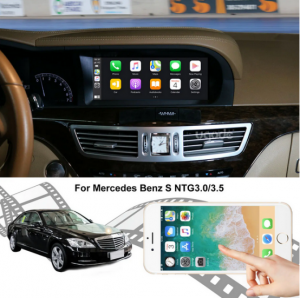
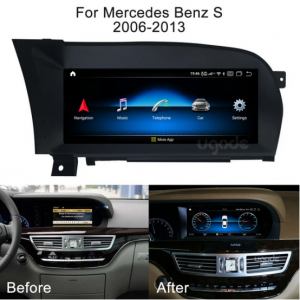
In modern cars, the upgrade of the in-car entertainment system has become an important part of improving the driving experience. UGODE Android display provides a rich function and modern technology experience for Mercedes-Benz S-Class (W221, 2006-2013) models. The following are detailed installation steps to help you successfully complete the installation of UGODE Android display.
Tools and Materials Required for Installation
UGODE Android Display: Make sure you purchase the UGODE Android Display that is suitable for Mercedes-Benz S-Class W221.
Tools:
- Screwdrivers (Phillips and flat)
- Pry bar (for removing interior trim)
- Cable connector (as needed)
- Electrical tape (to secure cables)
Instructions: Installation instructions for the UGODE display, make sure to follow the steps.
Detailed steps to install 12.3-inch Mercedes Benz UGODE Android display
If you need more detailed installation steps, here is the UGODE Android display installation guide for 12.3-inch Mercedes-Benz models:
Remove the original car radio:
- Use tools to remove the original car radio, making sure to be careful during the removal process to avoid damaging the surrounding interior.
Remove the screws from the clamp:
- Remove the screws securing the clamp to facilitate subsequent disassembly.
Remove the original car screen and unplug it:
- Carefully remove the original vehicle display and disconnect all connected plugs, making sure not to damage the connecting wires.
Tear off the decorative strip:
- Remove the decorative strip carefully, making sure not to damage the interior.
Tear off the air conditioner panel:
- Remove the air conditioning control panel and prepare for the next step.
Remove screws and remove panel:
- Remove the screws securing the panel and remove it.
Unplug and remove the CD player:
- Unplug the CD player and remove it.
Unplug the power cord from the back of the CD player:
- Unplug the power cord from the back of the CD player, making sure the CD player is completely removed.
Remove the fixing screws:
- Remove the fixing screws and prepare to install the new display.
Remove other fixing screws:
- Remove the other fixing screws again, making sure all screws are removed.
Remove the original car base:
- Carefully remove the original vehicle base and prepare to install the new base.
Remove the original vehicle bracket:
- Remove the original vehicle bracket and prepare to install the new bracket.
Connecting cables:
- Connect the cables from the UGODE Android Display to the vehicle’s power and audio systems, making sure the connections are secure.
Plug the USB audio cable into the USB port in the glove box:
- Connect the USB audio cable to the USB port in the glove box for later use.
Connect LVDS cable:
- Connect the LVDS cable to the display, making sure the connection is secure.
Connect the Android power cable to the original car power supply:
- Connect the Android power cable to the original car power cable to ensure the power connection is normal.
Plug the Android power cable into the CD player:
- Connect the Android power cable to the CD player to ensure the power supply is normal.
Open the co-cockpit and install the GPS antenna and 4G antenna:
- Install GPS antenna and 4G antenna in the co-pilot cabin, make sure the antenna is in the right position.
Open the co-cockpit panel:
- Remove the co-pilot’s panel to allow for the installation of the antenna.
Place 4G antenna:
- Place the 4G antenna in a suitable location to ensure a good signal.
Place the GPS antenna:
- Place the GPS antenna in a suitable location to ensure a good signal.
Remove the fixing screws in the glove box:
- Remove the fixing screws in the glove box to install the new equipment.
Install Android Metal Bracket:
- Install the Android metal holder in the car and make sure the holder is stable.
Connect the clock plug to the base:
- Connect the clock plug to the new base and ensure the clock functions properly.
Install the base into the vehicle:
- Fasten the new mount into the vehicle, making sure it is secure.
Tighten the bracket screws:
- Make sure the bracket screws are tight to ensure stability.
Tighten the screws on the base:
- Make sure the screws on the base are also tightened to ensure a secure installation.
Plug the power cable into the back of the display:
- Finally, connect the power cable to the back of the UGODE Android Display to ensure that the power supply is normal.
Appearance after installation
After installation, your Mercedes-Benz will be equipped with a new UGODE Android display screen, providing more functions and a modern technological experience. You can enjoy functions such as GPS navigation, multimedia playback, Apple Carplay and Android Auto, which will enhance the fun and convenience of driving.
Notes
- During installation, be careful to avoid damaging the vehicle interior or circuits.
- If you are not familiar with the installation process, it is recommended to seek help from a professional technician to ensure the correctness and safety of the installation.
- After installation, check the working status of the connecting cables and the display regularly to ensure they are functioning properly.
Through the above steps, you can successfully complete the installation of UGODE Android display screen on Mercedes-Benz S-Class and enjoy a new driving experience!
Post time: Nov-29-2024


