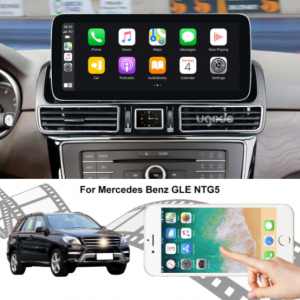
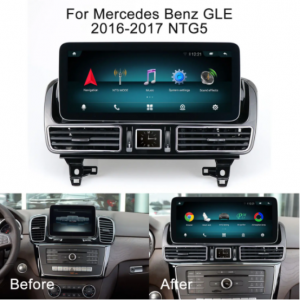
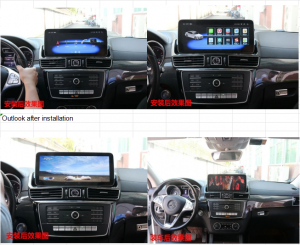
Upgrading your Mercedes-Benz GLE with the Ugode Android display is an excellent way to enhance your driving experience. The 12.3-inch display not only provides a larger viewing area but also integrates advanced features such as real-time navigation, smartphone connectivity, and high-quality audio. This blog will guide you through the installation process step-by-step, ensuring a smooth transition to your new multimedia system.
Tools and Materials Needed:
- Screwdriver set (Phillips and flathead)
- Trim removal tool
- Ugode 12.3-inch Android display
- USB audio cable
- GPS antenna
- 4G antenna
- Power harness
- Zip ties (optional for cable management)
Step-by-Step Installation Process
Prepare Your Workspace
Ensure you have a clean, well-lit workspace. Gather all tools and materials needed for the installation.
Disconnect the Battery
For safety, disconnect the negative terminal of the car battery to prevent any electrical issues during installation.
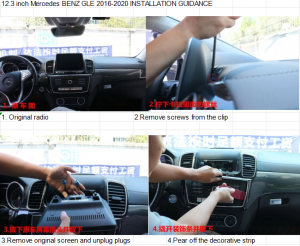
Remove the Original Radio
Carefully pry out the original radio unit from the dashboard using a trim removal tool. Be gentle to avoid damaging the surrounding trim.
Remove Screws from the Clip
Locate and remove the screws that secure the clip holding the radio in place. Keep these screws in a safe location for reinstallation.
Remove the Original Screen
Gently take out the original screen and unplug all connected cables. Handle the connectors carefully to avoid damage.
Peel Off the Decorative Strip
Use the trim removal tool to carefully peel off the decorative strip surrounding the screen. This will expose additional screws and components.
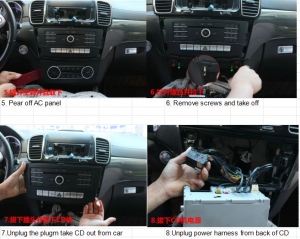
Remove the AC Panel
Remove the AC panel to access the screws behind it. This step is crucial for gaining full access to the radio unit.
Unscrew Additional Components
Unscrew and remove any additional components that may be blocking access to the radio unit. This may include screws from the AC panel or other surrounding parts.
Unplug the CD Player
Disconnect the plug and remove the CD player from the vehicle. This will create space for the new multimedia system.
Disconnect Power Harness from CD
Disconnect the power harness from the back of the CD player. Ensure that all connections are properly labeled for easy reinstallation.
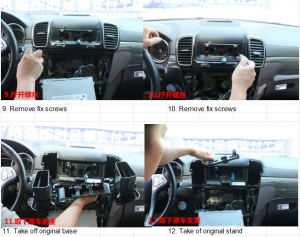
Remove Fixing Screws
Unscrew any fixed screws that are securing the original base. This will allow you to remove the base and prepare for the new installation.
Remove the Original Base
Carefully remove the original base from the dashboard. This may require some gentle prying.
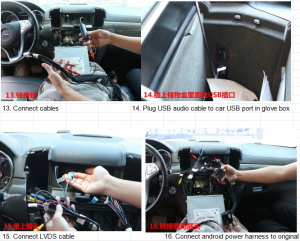
Connect the Ugode Display Cables
Connect the necessary cables for the Ugode Android display. Ensure that all connections are secure and properly aligned.
Plug USB Audio Cable into Car USB Port
Connect the USB audio cable to the USB port located in the glove box. This will allow for audio playback from your device.
Connect the LVDS Cable
Connect the LVDS cable to the new display. This cable is essential for transmitting video signals.
Connect the Android Power Harness
Attach the Android power harness to the original wiring. This will provide power to the new system.
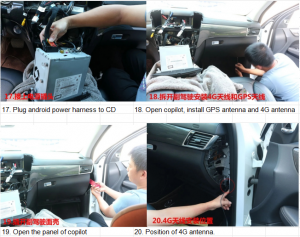
Plug the Android Power Harness into the CD
Connect the Android power harness to the CD player. This step is crucial for ensuring that the new system receives power.
Install GPS and 4G Antennas
Open the copilot area and install both the GPS and 4G antennas. Position them for optimal signal reception.
Open the Copilot Panel
Access the copilot panel for further installation. This area may contain additional components that need to be adjusted.
Position the 4G Antenna
Secure the 4G antenna in a suitable location, ensuring it is positioned away from any metal surfaces that may interfere with the signal.
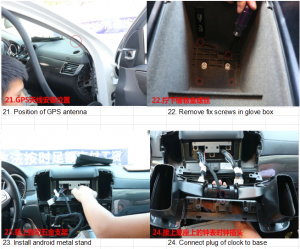
Position the GPS Antenna
Place the GPS antenna in an optimal position for signal reception, typically on the dashboard or near the windshield.
Remove Fixing Screws in the Glove Box
Unscrew any fixed screws located in the glove box area. This will allow for better access to the wiring.
Install the Ugode Metal Stand
Secure the new Ugode metal stand in place. This will provide stability for the new display.
Connect the Clock Plug to the Base
Ensure the clock plug is connected to the new base. This will maintain the functionality of the clock display.
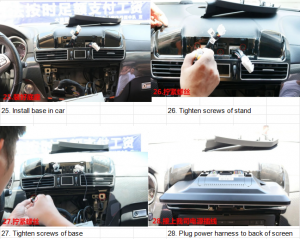
Install the Base in the Car
Position the new base securely in the vehicle. Ensure it is aligned properly with the dashboard.
Tighten Screws of the Stand
Tighten all screws on the stand to ensure stability. This will prevent any movement of the display during use.
Tighten Screws of the Base
Secure the base with screws to prevent any movement. Double-check that all screws are tightened properly.
Plug Power Harness into the Back of the Screen
Finally, connect the power harness to the back of the Ugode 12.3-inch screen. This will complete the installation process.
Final Steps
Reconnect the Battery
Reconnect the negative terminal of the car battery.
Test the System
Turn on the vehicle and test the new Ugode Android display. Ensure that all features, including navigation, audio, and connectivity, are functioning correctly.
Reassemble the Dashboard
Carefully reassemble any dashboard components that were removed during the installation process.
Conclusion
Upgrading to the Ugode 12.3-inch Android display in your Mercedes-Benz GLE (2016-2020) can transform your driving experience with enhanced features and connectivity. By following this installation guide, you can successfully install the new display and enjoy all the benefits it has to offer. Whether it’s for navigation, entertainment, or connectivity, your new multimedia system will make every journey more enjoyable. Happy driving!
Post time: Nov-15-2024


