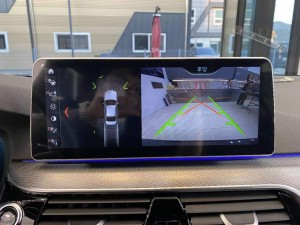
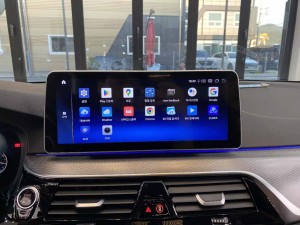
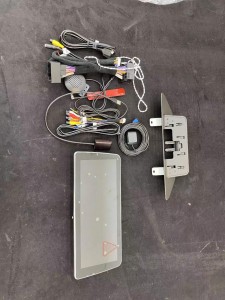
In the process of installing the UGODE car screen for the BMW 5serie G30, you will go through a series of detailed steps. The following is a complete installation guide to help you complete the process smoothly.
Model introduction: BMW 5serie G30
The BMW 5serie G30 is the seventh generation of the BMW 5 Series. Since its launch in 2017, it has quickly become a leader in the luxury mid-size sedan market with its elegant exterior design, excellent power performance and advanced technology configuration. The G30 series not only inherits BMW’s consistent sports genes, but also makes comprehensive improvements in comfort and technology.
Powertrain: The BMW 5serie G30 535i is equipped with a 3.0-liter turbocharged six-cylinder engine with a maximum power of 335 horsepower and a peak torque of 450 Nm, providing strong power output and excellent acceleration performance. Whether driving in the city or on the highway, the G30 can bring unparalleled driving pleasure to the driver.
Interior Design: The interior design of the G30 focuses on the combination of luxury and technology, using high-end materials and exquisite craftsmanship to create a comfortable driving environment. The car is equipped with the latest technology configurations, including a digital instrument panel, a luxury audio system and a variety of driver assistance functions.
Safety Performance: The BMW 5serie G30 is equipped with a number of active and passive safety technologies, such as collision warning, lane keeping assist and adaptive cruise control, to ensure the safety of the driver and passengers.
Product Features: UGODE car screen
UGODE car screen is a high-performance in-car entertainment system designed for BMW 5serie G30, aiming to enhance the driving experience and in-car entertainment functions. The following are the main features of UGODE car screen:
High-definition display: UGODE car screen uses a 12.3-inch high-definition IPS touch screen with a resolution of up to 1920×720, ensuring clear visual effects. Whether it is navigation maps or multimedia content, users can enjoy more delicate pictures.
Smart Connectivity: The system supports the latest Apple CarPlay and Android Auto, allowing users to easily connect their smartphones to the car system to access navigation, music and applications. Through wireless or wired connections, users can stay connected to the outside world while driving and enjoy a richer entertainment experience.
Multi-tasking: UGODE car screen supports split screen function, users can view GPS navigation and music playback interface at the same time, which improves the convenience of multi-tasking. This function is especially suitable for drivers who need to use navigation and listen to music at the same time while driving.
Intuitive User Interface: The new car screen has a more user-friendly interface design and more intuitive operation. Users can easily access various functions by touch, voice or knob, improving the overall user experience.
Real-time updates and online services: UGODE car screen supports OTA (Over-The-Air) online upgrades, and users can obtain the latest software version and functions at any time to ensure that the car system is always up to date. In addition, the system also provides online services such as real-time traffic information and weather forecasts, which improves driving convenience.
Enhanced audio experience: UGODE car screen supports multiple audio formats. Users can play music via USB, Bluetooth or SD card and enjoy high-quality audio-visual experience. Whether listening to music or watching videos, users can enjoy excellent sound and picture quality.
Installation Steps
The following are the detailed steps to install the UGODE car screen:
1. Prepare your workspace
- Clean up your work area: Make sure your work area is clean, tidy, and well-lit for easy operation.
- Gather tools and materials: Prepare the required tools and materials, including:
- Phillips screwdriver
- Plastic spudger
- Wrench
- Cleaning cloth
- UGODE display and its connecting harness
- Installation Instructions
- SAFETY FIRST: Always disconnect the negative terminal of the car battery before starting any electrical work to prevent electrical failure.
- Disconnect: Locate the power harness on the back of the CD player and gently disconnect it. Make sure all connections are properly labeled to facilitate reinstallation later.
- Remove Screws: Use a Phillips screwdriver to remove all screws securing the original base so the base can be removed in preparation for the new installation.
- Careful Removal: Carefully remove the original mount from the dashboard, gentle prying may be required to avoid damaging surrounding components.
- Connect cables: Connect the cables required for the UGODE Android display to the corresponding connectors. Make sure all connections are secure and properly aligned to avoid problems in subsequent use.
- Connect USB Cable: Connect the USB audio cable to the USB port in the glove box to play audio from your device.
- Connect Video Cable: Connect the LVDS cable to the new monitor. This cable is essential for transmitting video signals, ensuring the video signal is clear and stable.
- Power Connection: Connect the Android power harness to the original wiring to power the new system.
- Ensure Power: Connect the Android power harness to the CD player to ensure the new system is getting power.
- Open the co-pilot area: Enter the co-pilot area and install the GPS and 4G antennas. Place them in the best signal reception position to ensure stable signal.
- Fix the antenna: Fix the 4G antenna in a suitable position, making sure it is away from metal surfaces that may interfere with the signal, to obtain the best signal reception.
- Place the Antenna: Place the GPS antenna in the best location for signal reception, usually on the dashboard or near the windshield, to ensure the accuracy of the navigation system.
- Remove Screw: Remove the set screw inside the glove box to allow for better access to the wiring. This will ensure that there is enough room to work with in the subsequent steps.
- Secure Bracket: Secures the new UGODE metal bracket in place, providing stability for the new display. Make sure the bracket is securely connected to the dashboard to prevent loosening during use.
- Connect the clock plug: Make sure the clock plug is connected to the new base to maintain the clock display function. This will ensure that the clock will continue to work properly when using the new system.
- Secure the mount: Position the new mount securely in the vehicle, ensuring it is properly aligned with the dashboard. Check the alignment of the mount to ensure a secure installation.
- Fix the base: Secure the base with screws to prevent it from moving. Double check that all screws are properly tightened to ensure the stability of the base.
- Connect the Power Cable: Finally, connect the power cable harness to the back of the UGODE 12.3″ screen to complete the installation process. Make sure the connection is secure to avoid power issues in subsequent use.
- Connect the Battery: Reconnect the negative terminal of the car battery to ensure power is restored. Check that the connection is secure to prevent the battery from coming loose.
- Turn on the vehicle: Start the vehicle and test the new UGODE Android display. Make sure all functions (including navigation, audio and connectivity) are functioning properly. Pay attention to the screen’s response and the performance of each function while testing.
- Assemble with Care: Carefully reassemble any dashboard components removed during installation, ensuring all parts are properly aligned and secured. Check all clips and screws to ensure the dashboard is secure.
2. Disconnect the battery
3. Disconnect the power harness from the CD
4. Remove the fixing screws
5. Remove the original base
6. Connect UGODE display cable
7. Plug the USB audio cable into the car USB port
8. Connect LVDS cable
9. Connect Android power harness
10. Insert the Android power harness into the CD
11. Install GPS and 4G antenna
12. Locate the 4G antenna
13. Locate the GPS antenna
14. Remove the fixing screws in the glove box
15. Install UGODE metal bracket
16. Connect the clock plug to the base
17. Install the base into the car
18. Tighten the screws on the base
19. Plug the power cable into the back of the screen
20. Reconnect the battery
21. Test system
22. Reassemble the dashboard
Summarize
With the above steps, you can successfully install the UGODE car screen on the BMW 5serie G30. Make sure to operate carefully at each step to avoid damaging any parts. If you encounter any problems during the installation process, please refer to the UGODE installation instructions or contact customer support for help. After completing the installation, you will be able to enjoy a more modern in-car entertainment experience, improving the convenience and fun of driving.
Post time: Dec-16-2024


