Brief Introduction
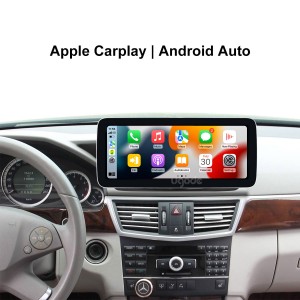
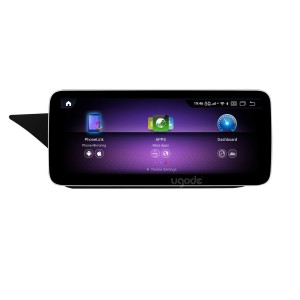
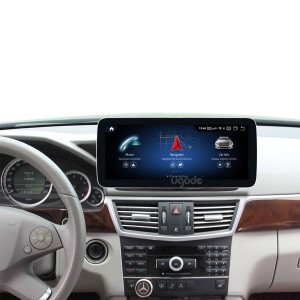
Ugode’s E-W211 Android Multimedia System is a high-performance in-car entertainment system designed for the Mercedes-Benz E-Class W211 model. It integrates multiple functions such as navigation, audio playback and Internet connection, aiming to provide drivers with a smarter and more convenient driving experience. As technology continues to advance, regularly upgrading the system can ensure that you get the latest features and performance optimizations. The following is a detailed guide on how to install and upgrade Ugode’s E-W211 Android Multimedia System.
How to install Ugode’s E-W211 Android multimedia system
Preparation
Before you begin installation, make sure you have the following tools and materials:
- Screwdriver (Phillips and flat head)
- Pry bar (for removing panels)
- Connection cable (usually included with the product)
- Adapter (if necessary)
- Installation Manual (included with the product)
- Cleaning cloth (for cleaning the installation area)
Installation Steps
Remove the original car display:
- Use a spudger to carefully remove the dashboard panel, avoiding damaging the plastic clips.
- Remove the original car display, usually you need to remove several screws. Remember to save these screws for later installation.
Connect new display:
- Plug the connection cable of Ugode’s E-W211 Android multimedia system into the power and data interface of the original car. Make sure the connection is firm to avoid problems in subsequent use.
- If your car model requires an adapter, make sure to use it in this step.
Install GPS antenna (if applicable):
- Mount the GPS antenna on the roof or dashboard of your car, making sure it has a good signal. Usually, the antenna will have a sticky back for easy attachment.
Install the front camera (if applicable):
- If you choose to install a front camera, please find a suitable mounting location on the front of the vehicle and connect the camera to the E-W211 system.
Fix the new display:
- Place the Ugode E-W211 Android Multimedia System into the dashboard, making sure all connecting wires are not pinched.
- Secure the display with the screws you removed earlier, making sure it is secure.
Connect power:
- Make sure all power cables are connected properly to avoid short circuits or power failures.
Test system:
- Start the vehicle and check if the Ugode E-W211 Android multimedia system is working properly. Test functions such as navigation, audio playback, Bluetooth connection, etc. to ensure everything is working properly.
Reinstall the Dashboard Panel:
- Once the system is confirmed to be normal, reinstall the dashboard panel, making sure all clips and screws are securely in place.
Perform system settings:
- Set up the system according to your personal preferences, including language, time, audio settings, etc. Connect to WiFi and Bluetooth to ensure that your phone can connect smoothly.
How to upgrade Ugode’s E-W211 Android multimedia system
Upgrade Preparation
Before upgrading your system, please ensure that you have the following conditions:
- Stable Internet Connection: Make sure your vehicle is connected to WiFi during the update process.
- Sufficient power: Make sure the vehicle battery is fully charged to avoid power outages during the upgrade process.
- Backup Data: Before performing any upgrade, it is recommended to back up important data and settings in the system.
Upgrade steps
Check the current version:
- Start Ugode’s E-W211 system, enter the settings menu, and check the current Android version and system version.
Connect to WiFi:
- Make sure the system is connected to a stable WiFi network so that the latest system updates can be downloaded.
Check for updates:
- Find the “System Update” or “Software Update” option in the settings menu and click Check for Updates. The system will automatically search for available updates.
Download Update:
- If an update is available, you will be prompted to download it. Click the “Download” button to start downloading the latest system update.
Install Update:
- Once the download is complete, you will be prompted to install the update. Click the “Install” button and the system will automatically reboot and begin installing the update. Please be patient as the installation process may take several minutes.
Reboot the system:
- After the update is complete, the system will automatically restart. You can enter the settings menu again to confirm that the system version has been updated to the latest version.
Restore settings (if necessary):
- If some settings are lost during the upgrade process, you can restore the system settings based on the previous backup.
- During the upgrade process, please do not turn off the power or disconnect the WiFi connection to avoid system damage.
- If you encounter problems during the upgrade process, please refer to Ugode’s user manual or contact customer support for assistance.
- Check for updates regularly to ensure your system is always up to date and enjoy optimal performance and functionality.
Notes
in conclusion
Through the above steps, you can smoothly install and upgrade Ugode’s E-W211 Android multimedia system. After the installation is complete, you will be able to enjoy a smarter driving experience, including efficient GPS navigation, rich audio playback and convenient Internet connection. Regularly upgrading the system will ensure that you get the latest features and performance optimizations, making your driving life more pleasant and convenient. Whether it is daily commuting or long-distance travel, Ugode’s E-W211 system will bring you a more pleasant driving experience.
Post time: Dec-02-2024


